WordPress Change Permalinks For One Category Only – Rocon
September 20, 2024 by Nitish
September 20, 2024 by Nitish

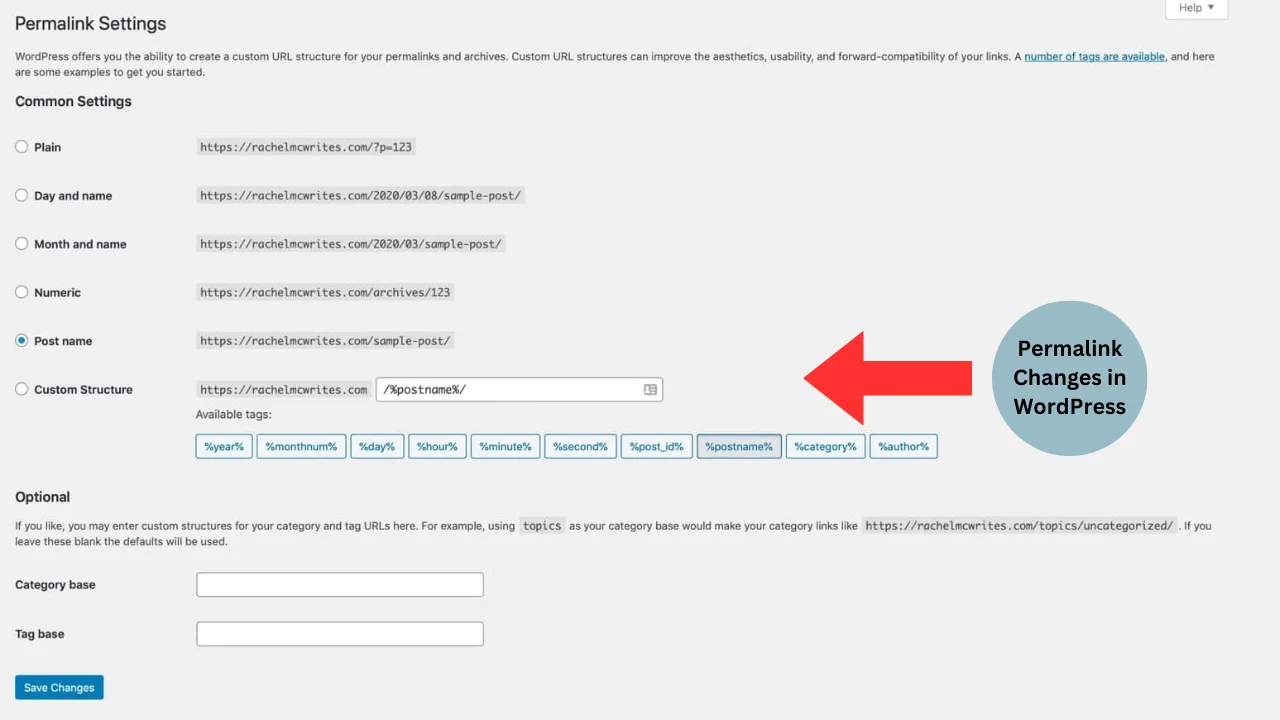
When you change permalink settings in WordPress, the new structure usually applies to your entire site. But what if you want to change the permalink for just one single category — without modifying every post or breaking your existing URLs?
This situation is common when you’re reorganizing your content, improving SEO, or targeting category-specific search intent. For example, you may want your blog posts to use /blog/post-name/, while your product reviews use /reviews/post-name/. Or maybe you’re rebranding one part of your site and need its URLs to better match keywords and user search behavior.
The good news: you can change the permalink structure for one WordPress category only, but you’ll need to do it carefully to avoid broken links, redirect issues, or indexing problems.
In this guide, we’ll walk through multiple safe methods—including using category slug settings, .htaccess rewrite rules, and plugin-based solutions—so you can update URLs smoothly while preserving your SEO value and user experience.
Before we jump into the how, let’s address the why. There are several reasons you might want to customize the permalinks for a specific category:
Let’s get into the actual steps. Changing permalinks for one category in WordPress can be done in a few different ways, depending on your preferences and technical comfort level.
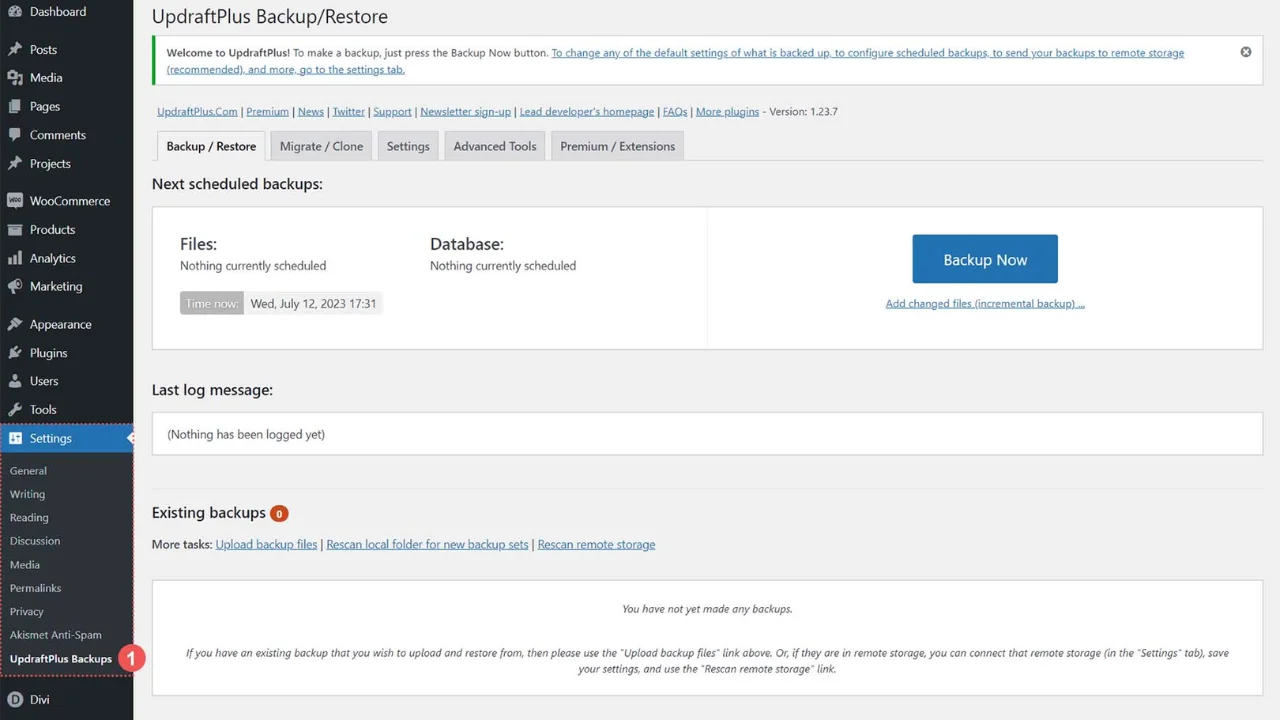
Before making any major changes to your WordPress site, always back it up. You can use popular backup plugins like UpdraftPlus or BackupBuddy. With this step, you can be sure that you have a backup of your website in case something goes wrong with the permalink structure modification.
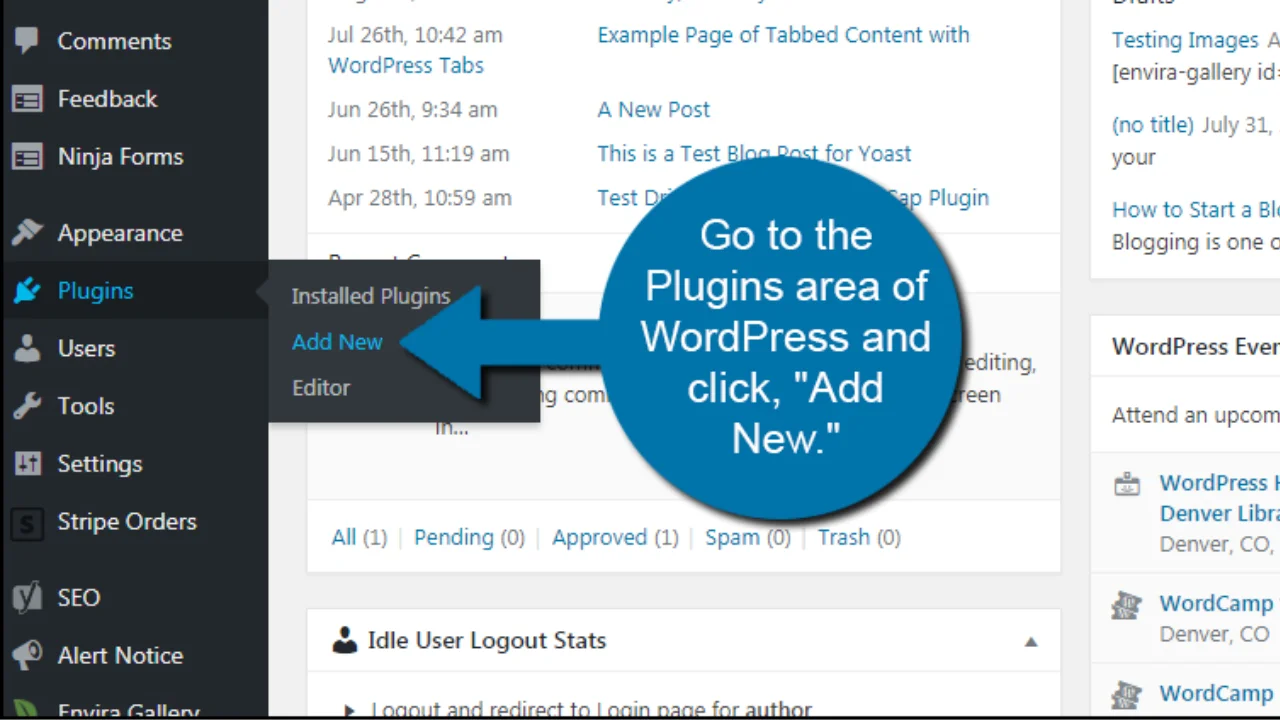
One of the easiest ways to change permalinks for a specific category without diving into the code is by using a plugin. The Custom Permalinks plugin is a popular choice for this task.
This plugin allows you to customize individual permalinks for your posts, pages, and categories.
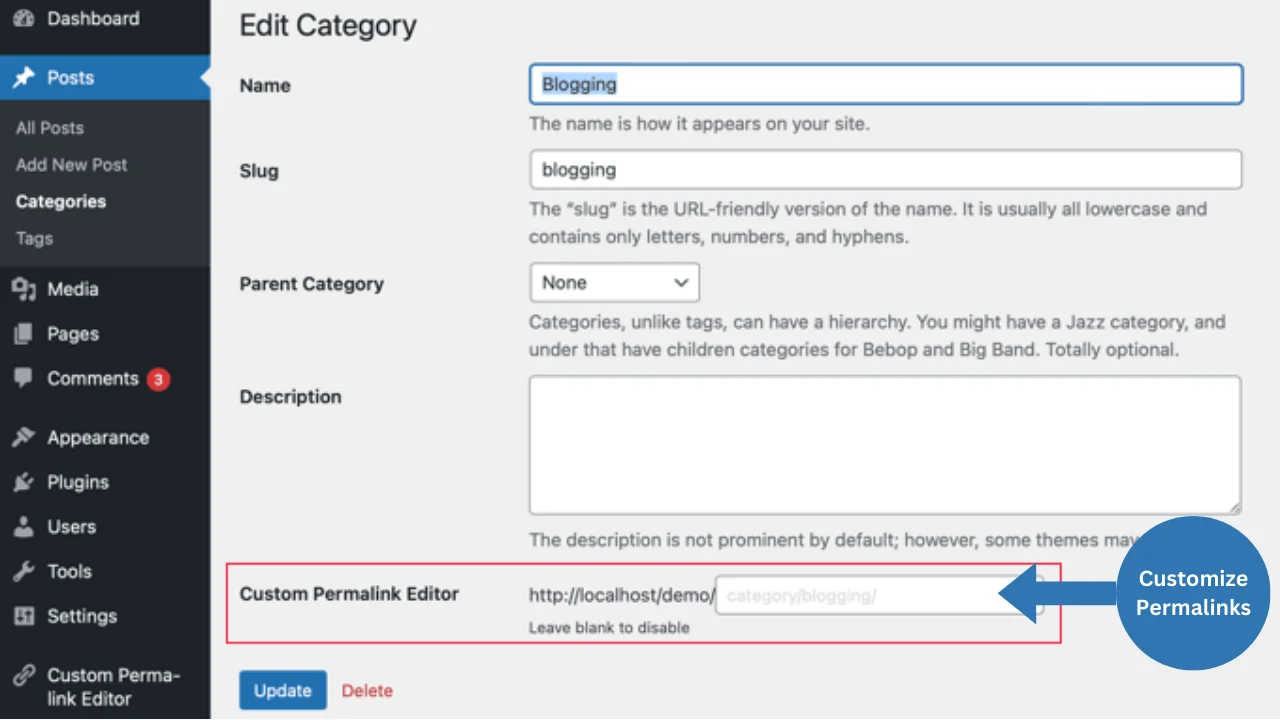
Once you’ve entered your custom permalink, click Update to save the changes.
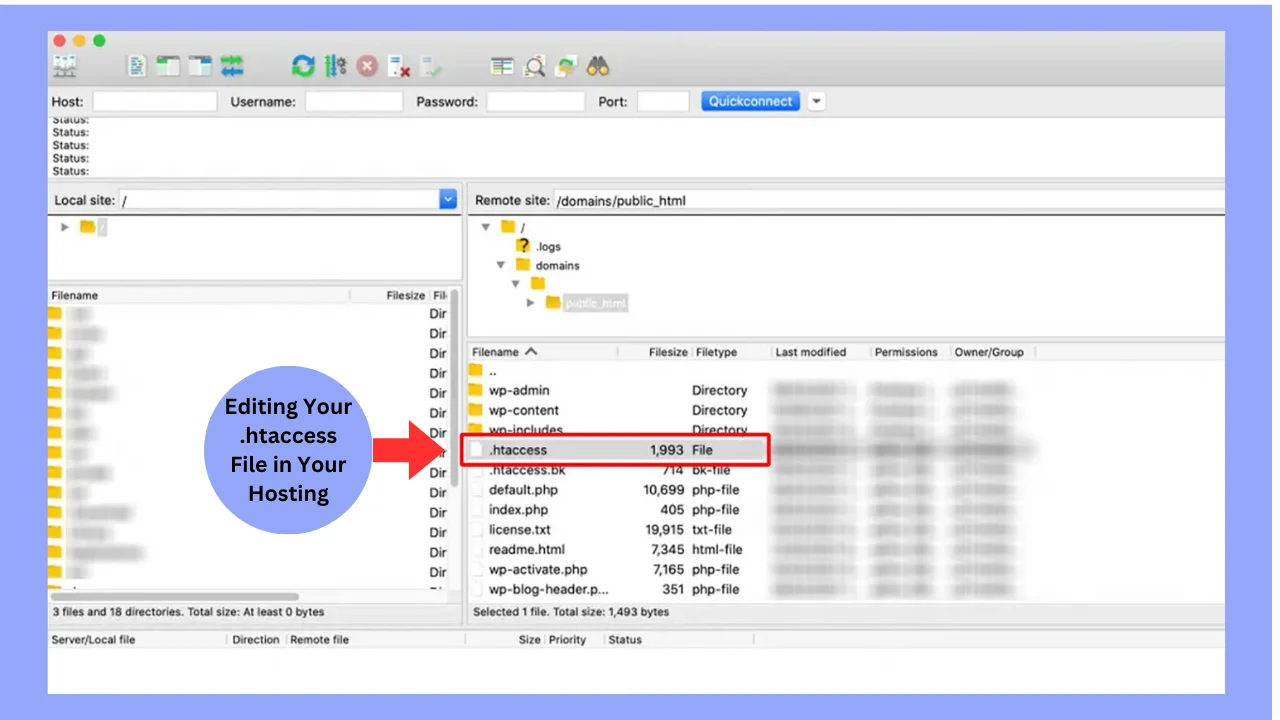
While plugins make it easier to change permalinks, you can also manually edit the .htaccess file to make changes to specific category URLs.
To do this:
Inside the file, you can add a custom rewrite rule for the category you want to change.
For example:
RewriteRule ^category-name/(.*)$ /new-category-name/$1 [R=301,L]
This method requires some technical know-how but provides more control over URL structure.
After making permalink changes in WordPress, sometimes you need to regenerate your .htaccess file to ensure that the changes take effect.
Once you’ve changed the category permalink, it’s important to update all internal links that refer to the old URL. Manually doing this for every post or page can be time-consuming, so using a plugin like Better Search Replace can simplify the process.
Here’s how you can do it:
This process will automatically update all internal links on your site to reflect the new URL structure.
If you’ve changed a category permalink, you’ll want to ensure that any links to the old URL still work. The best way to do this is by setting up 301 redirects, which permanently redirect traffic from the old URL to the new one.
You can easily set up 301 redirects using a plugin like Redirection:
This ensures that any visitors or search engines attempting to access the old URL will be automatically redirected to the new one, preserving both your traffic and SEO ranking.
Once you’ve completed all of the steps above, test your site thoroughly:
If everything looks good, you’re all set!
Changing category permalinks is mostly straightforward, but sometimes things don’t update immediately — especially if caching or rewrite rules are involved. Here’s how to fix the most common problems:
If your category page or posts under that category are showing a 404 Not Found error, this usually means WordPress rewrite rules didn’t refresh.
This forces WordPress to rebuild the rewrite rules, restoring the new category URLs.
If your category keeps redirecting back and forth, it often happens when:
Caching plugins or CDN caches can continue showing the old URLs, even when your site is updated.
Once caching is cleared, the new permalinks should appear instantly.
If saving permalinks didn’t help:
Add this temporary code to your theme’s functions.php:
flush_rewrite_rules();
Then refresh your site once, and remove the line afterward. This triggers a clean rewrite flush and fixes persistent 404 or routing problems.
In addition to these benefits, custom permalinks support better branding, as they can include your brand name or specific terms relevant to your content. They also make tracking and analyzing site traffic more effective by providing clearer URL structures.
Customizing category permalinks in WordPress can seem daunting at first, but with the right tools and steps, it’s a simple process that can have a significant impact on your site’s SEO and user experience.
By following this step-by-step guide, you’ll be able to change the permalink for one category in WordPress without breaking your site or hurting your search engine rankings. Just remember to back up your site, test your changes, and set up 301 redirects to ensure a smooth transition for both your users and search engines.
Follow our Rocon blog for more detailed instructions and advice on WordPress. If you find this information helpful, please tell others about it and post a comment below!
Yes, you can change permalinks manually by editing your .htaccess file or writing custom code in your theme’s functions.php file. However, plugins like Custom Permalinks simplify the process and are generally recommended for non-technical users.
Yes, changing permalinks can affect your SEO. However, as long as you implement 301 redirects from the old URLs to the new ones, you should retain most of your search engine rankings.
If your permalinks aren’t working after you’ve made changes, try regenerating your .htaccess file by going to Settings > Permalinks and clicking Save Changes. If the issue persists, check for plugin conflicts or file permission errors.
Yes, WordPress allows you to customize permalinks for individual posts and pages by editing the slug directly in the post or page editor.
A 301 redirect is permanent, signalling to search engines that the URL has permanently moved. A 302 redirect is temporary and should only be used when the change is not permanent.
Elevate your WordPress hosting with 30-day money-back guarantee, free migration, and 24/7 support.
Sign Up Today
Before You Go… Get 1 Month FREE on Rocon Hosting!

Experience lightning-fast speeds

No downtime or hidden fees

Dedicated 24/7 expert support


Leave a Reply