Roconpaas

Blog

DTF WordPress Plugin – Complete Guide for POD Stores

September 17, 2025 by Nitish
WordPress Keeps Logging Me Out

Introduction

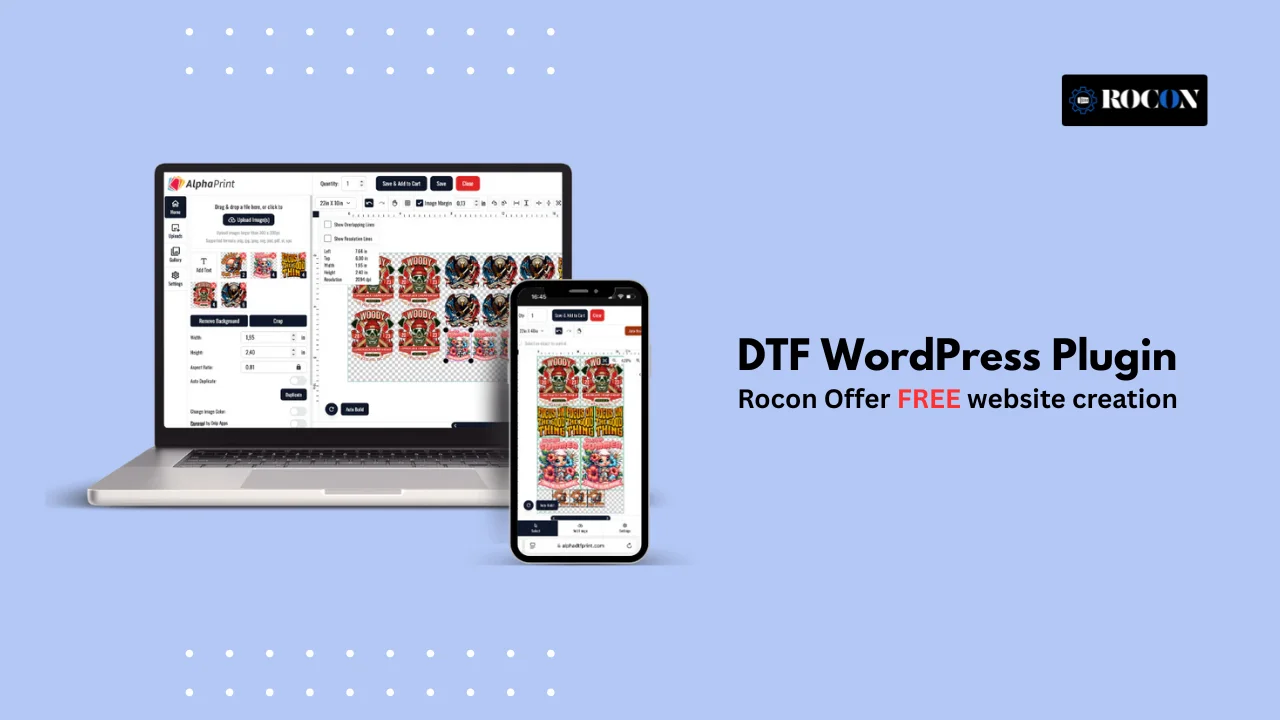
If you have a print on demand store one of the biggest headaches is dealing with custom designs and allowing customers to preview their orders before checkout. That’s where a DTF WordPress plugin comes in. 

DTF stands for Direct-to-Film printing and is a powerful way to create custom designs on apparel and other products. For WordPress and WooCommerce users a plugin can do the whole process for you—design upload to order fulfillment.

In this post we’ll cover everything you need to know about DTF plugins for WordPress: what they are, why you need one, the best plugins to use, setup, customization, troubleshooting and even how they compare to big print-on-demand platforms like Printful or Printify. 

By the end you’ll have a plan to build a professional DTF online store that looks good and works smoothly for your customers.

What is a DTF WordPress Plugin?

DTF WordPress plugin is a software add-on that integrates DTF (Direct-to-Film) printing into your WordPress or WooCommerce store. Instead of uploading designs, converting files or worrying if the customer’s image will print, a plugin does all the work for you.

Think of it as a bridge between your customer and the final product:

  • Customers can upload their artwork, see how it looks on a t-shirt, mug or hoodie and make adjustments in real-time.
  • Store owners get clean print ready files without spending hours preparing designs.
  • Printers get the correct format and dimensions for production, reducing errors and reprints.

This category is slightly different from general print-on-demand tools. While big platforms like Printify outsource the printing, DTF plugins give store owners more control and flexibility especially if you manage your own printing setup or work with local vendors.

In short a DTF WordPress plugin is not just a convenience – it’s the backbone of running a custom printing store.

Why Use a DTF Plugin Instead of Manual Setup?

Many beginners think they can handle DTF orders manually—customers email their designs and you manually prep the files. While that sounds doable at first, it quickly gets messy and unscalable. Here’s why a DTF plugin for WordPress is the way to go:

  • Product Personalization Made Easy: No more back and forth emails. Customers upload files directly on your site. The plugin ensures the file is the right size and format.
  • Live Design Previews: Shoppers see their artwork on the product instantly, reducing abandoned carts and increasing happiness.
  • Print-Ready Files Automatically: No more manual resizing or converting. Plugins often generate print-ready files compatible with DTF printers.
  • Error Reduction: Manual processes increase the risk of mistakes—wrong file sizes, blurry prints or missing design details. Automation prevents those.
  • Better Customer Experience: A smooth design workflow makes your store look professional and trustworthy.

If you want to scale your store and deliver high quality prints without drowning in manual work, a DTF plugin is non-negotiable.

Key Features to Look for in a DTF WordPress Plugin

Not all plugins are created equal, and choosing the right one can make or break your store’s success. Here are the must-have features you should look for:

1. File Upload Support

    • Accepts multiple formats (PNG, JPG, SVG).
    • Enforces minimum resolution to avoid pixelated prints.

2. Product Preview Tools

    • Real-time design placement on apparel or accessories.
    • Zoom and rotate options for better visualization.

3. WooCommerce Integration

    • Seamlessly connects with checkout and order management.
    • Links customer uploads directly to the order.

4. Print-Ready File Handling

    • Automatically converts customer uploads into production-ready files.
    • Handles transparency and color profiles for accurate prints.

5. Order Automation

    • Sends files directly to connected printers or fulfillment centers.
    • Reduces manual intervention, saving hours of work weekly.

6. Mobile Responsiveness

    • Ensures customers can design and order from their smartphones.
    • Mobile UX is critical, as most shoppers browse from phones.

7. Performance & Speed

    • Lightweight plugin code that won’t slow down your site.
    • Lazy-loading previews to improve performance.

8. SEO-Friendly Image Handling

    • Generates optimized product images for search engines.
    • Helps your custom designs rank better in Google Image Search.

By checking these boxes, you’ll ensure your plugin not only makes life easier but also future-proofs your ecommerce setup.

7. Best DTF WordPress Plugins in 2025

Choosing the best DTF WordPress plugins can feel overwhelming because not every plugin is built with DTF printing in mind. Some are generic print-on-demand tools, while others are custom product design plugins that support DTF workflows. Below, I’ve listed the top options in 2025, with their strengths, drawbacks, and best use cases.

1. Fancy Product Designer

Fancy Product Designer is one of the most flexible product customization plugins available for WordPress. It supports Direct-to-Film printing workflows by allowing customers to upload images, adjust placements, and preview designs on live product mockups.

Key Features:

  • Drag-and-drop product customizer.
  • Supports transparent PNG files (ideal for DTF).
  • Layer-based editing for advanced design placement.
  • Export print-ready vector or high-resolution raster files.

Pros: Works seamlessly with WooCommerce, supports multiple product types.

Cons: Premium license required for advanced features.

Best for: store owners who want complete control over design previews and file outputs.


2. Lumise Product Designer

Lumise is another powerful product customization plugin designed with printing businesses in mind. It works perfectly for DTF printing stores by offering a clean UI and deep editing features.

Key Features:

  • Front-end editor with user-friendly design tools.
  • Supports multiple file formats and large uploads.
  • Ready-to-use product templates (t-shirts, hoodies, mugs, etc.).
  • Print-ready export with bleed and crop marks.

Pros: Modern interface, strong mobile performance.

Cons: Slight learning curve for beginners.

Best for stores that want to provide professional-level customization to customers.


3. Zakeke Interactive Product Designer

Zakeke is a SaaS-powered product customizer that integrates with WordPress and WooCommerce. It’s ideal for businesses that expect to scale since it handles much of the heavy lifting in the cloud.

Key Features:

  • 3D product previews for apparel and accessories.
  • Cloud-based file processing (faster site performance).
  • Automatic generation of high-resolution, print-ready files.
  • Integration with multiple fulfillment partners.

Pros: Handles heavy image files without slowing down your WordPress site.

Cons: Monthly subscription pricing.

Best for growing POD stores that want performance without managing server resources.


4. WooCommerce Custom Product Designer by ORION

This plugin is a lightweight option for WooCommerce users who want a simple but effective way to allow custom uploads. It’s not as advanced as Lumise or Fancy Product Designer but gets the job done for basic DTF workflows.

Key Features:

  • Customers upload their own images during product selection.
  • Supports drag-and-drop positioning.
  • Easy integration with WooCommerce checkout.

Pros: Affordable one-time purchase.

Cons: Lacks advanced editing and 3D preview.

Best for small businesses or beginners testing DTF ecommerce.


5. PitchPrint

PitchPrint is designed for professional printing businesses, and it shines when used for high-volume DTF printing operations.

Key Features:

  • Advanced online designer with text, image, and vector support.
  • Ready-to-print PDF outputs with crop marks and bleed.
  • Multi-language support for international stores.
  • Fast loading times even with complex designs.

Pros: Robust features for professional print shops.

Cons: Requires more setup time compared to simpler plugins.

Best for established businesses that need industrial-grade print file outputs.


6. Mugsie – Online Gang Sheet Builder

Mugsie simplifies DTF printing by allowing users to create gang sheets online with customizable sheet sizes and drag-and-drop functionality. It also provides cost optimization features for material savings.

Key Features:

  • Drag-and-drop interface.
  • Supports PNG and JPG uploads.
  • Customizable sheet sizes.
  • Cost optimization for prints.

Pros: Simple interface, cost comparison features, suitable for quick setups.

Cons: Limited advanced features, dependent on internet connection.

Best for: Small POD businesses looking for quick, efficient gang sheet creation.


7. Kixxl – DTF Gang Sheet Builder

Kixxl is designed for high-volume print shops and offers advanced features like AI-powered auto-nesting, background removal, and halftoning. It ensures optimized layouts, reduced material waste, and smooth WooCommerce integration.

Key Features:

  • AI-powered auto-nesting.
  • Background removal and halftoning.
  • Export high-resolution PNG or PDF.
  • Handles large print batches efficiently.

Pros: Scalable for large operations, advanced features, multiple file format support.

Cons: Higher pricing, setup may be complex for beginners.

Best for: Large POD businesses and enterprise-level print shops.

Comparison Table: Best DTF WordPress Plugins


Plugin Best For Pricing Model Print-Ready Export Ease of Use WooCommerce Integration
Fancy Product Designer All-in-one control & design previews One-time license Yes Medium ✅ Yes
Lumise Product Designer Advanced customization & sleek UI One-time license Yes Medium ✅ Yes
Zakeke Product Designer Cloud-based scalability Monthly SaaS Yes Easy ✅ Yes
WooCommerce Custom Product Designer (Orion) Budget-friendly basic customization One-time license Limited Easy ✅ Yes
PitchPrint Industrial-grade, high-volume printing Subscription Yes Medium ✅ Yes
Mugsie – Online Gang Sheet Builder Quick online gang sheet creation Subscription Yes Easy ✅ Yes
Kixxl – DTF Gang Sheet Builder High-volume DTF production & automation Custom pricing Yes Medium ✅ Yes

Quick Recommendation

  • For beginners → WooCommerce Custom Product Designer.
  • For growing stores → Fancy Product Designer or Lumise.
  • For enterprise-level stores → Zakeke or PitchPrint.

How to Install and Configure a DTF Plugin in WordPress

Once you’ve chosen the right DTF plugin, the next step is installation and configuration. I’ll use Fancy Product Designer as the primary example here (since it’s one of the most versatile), but the workflow is nearly identical for Lumise, Zakeke, and others.

Step 1: Install the Plugin

  1. Log in to your WordPress dashboard.
  2. Navigate to Plugins → Add New.
  3. If your plugin is available in the repository (like WooCommerce Custom Product Designer):
    • Search by name → Click Install Now → then Activate.
  4. If you purchased a premium plugin (like Fancy Product Designer or Lumise):
    • Click Upload Plugin → choose the .zip file → Install → Activate.
  • Show the Plugins → Add New → Upload Plugin screen.
  • Highlight the “Activate” button after installation.

Step 2: Connect to WooCommerce

Most DTF plugins work as an extension of WooCommerce.

  1. Go to WooCommerce → Settings → Products.
  2. Look for the new tab added by your plugin (e.g., “Fancy Product Designer” or “Lumise Settings”).
  3. Enable the plugin for specific product types (e.g., T-shirts, mugs, hoodies).
  4. WooCommerce product settings page with the new plugin tab highlighted.

Step 3: Create a Customizable Product

Now let’s create your first DTF-ready product:

  1. Navigate to Products → Add New.
  2. Enter product details (title, description, price).
  3. Scroll down to the Product Data section.
  4. Enable the “Customizable” option (this appears once the plugin is active).
  5. Define customization areas (front, back, sleeves, etc.).
  6. Product Data box with the “Customizable” checkbox.
  7. Preview of a t-shirt product with editable areas highlighted.

Step 4: Configure File Upload & Preview Settings

This is where your DTF plugin ensures the files are print-ready:

  1. Set allowed file formats (PNG, JPG, SVG recommended).
  2. Define minimum resolution (e.g., 300 DPI) to prevent blurry prints.
  3. Enable live preview so customers can see how their upload looks on the product.
  4. Optional: Enable layered editing (move, resize, rotate uploads).
  5. Plugin settings panel showing file type and resolution options.
  6. Example of a live preview with a design uploaded onto a hoodie.

Step 5: Customize the Design Editor (Optional)

Most premium DTF plugins allow you to tweak the editor:

  • Change button labels (e.g., “Upload Your Design”).
  • Set default fonts, colors, or templates.
  • Adjust editor layout for mobile devices.

This step is important for brand consistency and user experience.

  • Editor customization settings with color/font options visible.

Step 6: Test the Workflow

Before going live, always test like a customer:

  1. Visit the product page as a customer.
  2. Upload an image (e.g., PNG with transparent background).
  3. Preview the design → Add to cart.
  4. Complete checkout.
  5. In the WordPress admin panel, open the order → confirm that the print-ready file is attached.
  6. Customer product page with uploaded design preview.
  7. Admin order details showing downloadable print file.

Step 7: Optimize Performance

DTF plugins can be heavy if not configured properly. To ensure your site runs smoothly:

  • Use an image compression plugin (like ShortPixel or Smush).
  • Enable caching via plugins like WP Rocket or LiteSpeed Cache.
  • If using a cloud-based plugin (like Zakeke), rely on their processing instead of your server.
  • Performance dashboard showing improved load times.

With these steps, you’ll have a fully functional DTF workflow inside WordPress: from customer upload → live preview → WooCommerce checkout → print-ready files.

Advanced Customization Tips

Installing a DTF WordPress plugin and enabling it in WooCommerce gets you started, but to really stand out, you need to go beyond the basics. Customers expect a professional, smooth, and visually appealing experience. Here’s how you can fine-tune your DTF setup for maximum impact.

Custom CSS & Styling for the Product Preview

Most plugins give you default styles, but they may not match your store’s branding. Adding a few lines of CSS can make your design editor look polished and professional.

Examples of CSS tweaks:

  • Change the background color of the preview canvas.
  • Adjust button sizes and colors for better mobile UX.
  • Add subtle shadows or borders to uploaded designs for clarity.

/* Example: style the product preview canvas */

.fpd-container {

   background-color: #f9f9f9;

   border: 2px solid #eee;

   padding: 15px;

   border-radius: 10px;

}

Using Shortcodes for Flexible Placement

Many DTF WordPress plugins provide shortcodes that let you embed the design editor anywhere on your site. Instead of relying only on the default WooCommerce product page, you can place it in:

  • Landing pages for specific campaigns.
  • Elementor/Divi-designed custom product pages.
  • Blog posts that double as product sales funnels.

Example shortcode (Fancy Product Designer):

[fpd id=”123″ class=”my-dtf-editor”]

Integration with Divi and Elementor

If you’re using Divi or Elementor, you can make the DTF plugin feel native inside your custom layouts.

  • With Divi: Use a Code Module or WooCommerce Product Module, then inject the shortcode.
  • With Elementor: Use the Shortcode widget to display the editor in a custom product layout.

Pro tip: Add a sticky design editor panel on desktop screens so users can preview designs while scrolling through product details.

Conditional Options for Products

Advanced stores can configure conditional options:

  • Show different upload areas based on the product selected (e.g., front only for t-shirts, multiple panels for hoodies).
  • Limit image sizes based on product dimensions.
  • Offer different pricing depending on design placement (front-only vs front + back).

Optimizing for Faster Load Times

Since image-heavy plugins can slow down your site, performance tuning is non-negotiable.

  • Enable lazy loading for previews.
  • Compress uploads using a plugin like ShortPixel.
  • Use a Content Delivery Network (CDN) to serve design previews quickly worldwide.
  • If possible, use cloud-based editors (like Zakeke) so heavy lifting happens off your server.

With these customizations, your plugin won’t just “work” — it will feel like a professional-grade ecommerce platform tailored for your brand. Customers get smoother workflows, and you stand out from competitors using basic setups.

Common Issues and Troubleshooting

Even the best DTF WordPress plugins can run into issues if configurations, file uploads, or server settings aren’t optimized. Here’s a detailed troubleshooting guide to help you solve common problems quickly.

File Upload Errors

Problem: Customers report that their design upload fails or shows an unsupported file type error.

Possible Causes:

  • Incorrect file format (DTF plugins typically support PNG, JPG, SVG).
  • File size exceeds the server’s upload limit.
  • Permissions issue in WordPress uploads folder.

Solutions:

  1. Ensure only supported file types are allowed in the plugin settings.

Increase the upload limit in your php.ini file:

upload_max_filesize = 20M

post_max_size = 25M

  1. Verify that the wp-content/uploads folder has correct write permissions (755 or 775).
  2. Advise customers to compress images before upload without losing quality.
  3. Plugin file type settings panel.
  4. WordPress media upload error example.

Preview Not Rendering

Problem: Customers can upload designs, but the live preview doesn’t show the design correctly.

Possible Causes:

  • JavaScript conflicts with other plugins or themes.
  • Large file sizes causing the editor to timeout.
  • Old browser or unsupported device.

Solutions:

  1. Test the editor in incognito mode and on different browsers.
  2. Disable conflicting plugins one by one to identify JavaScript conflicts.
  3. Enable lazy loading or use a cloud-based plugin like Zakeke to handle heavy files.
  4. Reduce default canvas size for faster rendering on mobile.
  5. Product page preview not loading properly.
  6. Editor working after disabling conflicting plugin.

WooCommerce Integration Issues

Problem: Uploaded files don’t appear in orders, or checkout fails.

Possible Causes:

  • Plugin not properly connected to WooCommerce product type.
  • Incorrect product setup (customizable option not enabled).
  • Plugin version incompatible with WooCommerce version.

Solutions:

  1. Ensure the plugin is enabled for the relevant product type in WooCommerce settings.
  2. Check that each product has the Customizable option turned on.
  3. Update both WooCommerce and the DTF plugin to the latest versions.
  4. Test a sample order to verify the file appears correctly in the admin order view.
  5. WooCommerce order panel showing attached print-ready file.

Slow Product Pages

Problem: Pages with DTF product editors load slowly, affecting user experience.

Possible Causes:

  • Large preview images or multiple design layers.
  • Plugins using server-side processing instead of cloud.
  • Lack of caching or CDN.

Solutions:

  1. Compress images and enable lazy loading for previews.
  2. Use a caching plugin like WP Rocket or LiteSpeed Cache.
  3. Serve static assets through a CDN for faster worldwide delivery.
  4. Consider cloud-based design editors for heavy customizations (e.g., Zakeke).
  5. Performance report showing improved page speed after optimizations.

Other Tips for Smooth Operation

  • Always keep backups of your WordPress site before updating plugins.
  • Use staging environments to test new plugin versions.
  • Document your workflow for customer support and internal troubleshooting.

By following these troubleshooting steps, you ensure that your DTF WordPress plugin workflow is reliable, professional, and scalable. This makes your guide a true end-to-end resource for both beginners and advanced store owners.

DTF WordPress Plugin vs POD Alternatives

When building a print-on-demand store, many store owners face the choice: use a dedicated DTF WordPress plugin or rely on third-party POD platforms like Printful, Printify, or Teespring. Understanding the differences can save time, money, and headaches.

Control & Customization

DTF Plugin:

  • Full control over the design workflow, product layout, and file formats.
  • Customizable design editor that matches your branding.
  • Ability to set your own pricing, shipping, and fulfillment rules.

POD Platforms:

  • Limited control over product templates and file handling.
  • Design preview is usually standardized across stores.
  • Pricing and shipping are mostly fixed by the platform.

Takeaway:

  • If you want full control and brand consistency, a DTF plugin is superior.
  • POD platforms are easier to start with but offer less flexibility.

Costs & Profit Margins

DTF Plugin:

  • One-time license or subscription for the plugin.
  • You handle printing and fulfillment, which means higher profit margins per sale.
  • Additional cost: printer setup, ink, film, and other consumables.

POD Platforms:

  • No upfront plugin cost, but higher per-product fees.
  • Shipping and fulfillment are included but reduce your margin.
  • Some platforms charge extra for custom branding or premium mockups.

Takeaway:

  • DTF plugins are more cost-effective for scaling, while POD platforms are good for testing or low-volume stores.

Workflow & Automation

DTF Plugin:

  • Order processing can be automated, but you’re responsible for printing.
  • Best for stores that already have printers or plan to outsource locally.
  • Integrates directly with WooCommerce checkout for seamless workflows.

POD Platforms:

  • Handles production, packaging, and shipping automatically.
  • Less manual work but less control over production timing and quality.

Takeaway:

  • Choose a DTF plugin if you want to control production and fulfillment.
  • POD services are ideal if you want hands-off printing.

Product Range & Quality

DTF Plugin:

  • Product variety depends on your inventory and printer capabilities.
  • Quality control is fully in your hands.

POD Platforms:

  • Wide product selection, often including items you may not stock.
  • Quality varies by platform; you rely on their production standards.

Takeaway:

  • DTF plugins allow precise control over product quality.
  • POD platforms offer convenience but limited personalization.

SEO & Branding Advantages

DTF Plugin:

  • Your store URLs, images, and metadata are fully under your control.
  • Easier to optimize for search engines (product pages, custom mockups).
  • Helps in building a long-term brand rather than relying on a third-party marketplace.

POD Platforms:

  • SEO benefits are limited; your product pages may be subdomains or marketplaces.
  • Branding is often secondary to the platform’s default layout.

Takeaway:

  • DTF plugin provides superior SEO and branding potential for WordPress stores.

Quick Recommendation

Feature DTF Plugin POD Platform
Control & Customization Full control Limited
Costs One-time/subscription + printer No upfront cost, higher per product fee
Workflow & Automation Automated orders, manual print Fully automated production & shipping
Product Range & Quality Depends on your inventory Wide range, variable quality
SEO & Branding Fully optimized for WordPress Limited
  • Use a DTF plugin if you want full control, better margins, and branding advantages.
  • Use POD platforms for low-risk testing, minimal setup, or small-scale operations.

Best Practices for Running a DTF Print-on-Demand Store

Running a successful DTF WordPress store involves more than just installing a plugin. From design preparation to customer experience, here are expert tips to maximize efficiency, conversions, and brand credibility.

Optimize Product Images and Designs

  • Use High-Resolution Files: Ensure customer-uploaded designs are at least 300 DPI for sharp prints.
  • Provide Templates: Offer pre-sized templates to help customers create designs that fit perfectly.
  • Mockups: Include professional mockups to show how designs will look on products.

Streamline Customer Workflow

  • Simplify Uploads: Only accept necessary file formats to reduce errors.
  • Live Previews: Let users see their design in real-time to increase confidence.
  • Step-by-Step Guidance: Include tooltips or instructions for first-time users.

Automate Where Possible

  • Order Notifications: Send automated emails when a design is uploaded or order is confirmed.
  • Print-Ready File Generation: Plugins like Fancy Product Designer automatically convert files to ready-to-print formats.
  • Integrate with Printers or Fulfillment: Reduce manual handling by automating file transfer to production.

Pricing Strategy

  • Base + Customization Fee: Charge a base product price plus an additional fee for custom design uploads.
  • Volume Discounts: Offer incentives for bulk orders, especially for corporate or event merchandise.
  • Transparent Pricing: Clearly display customization costs to avoid cart abandonment.

Focus on SEO and Marketing

  • Optimize Product Pages: Use descriptive titles, alt text for images, and meta descriptions.
  • Blog & Tutorials: Publish content like “How to Design Your Own T-Shirt” to attract organic traffic.
  • Social Media Integration: Allow customers to share their designs on social platforms for free marketing.

Test Everything Regularly

  • Order Workflow: Place test orders to ensure uploads, previews, and checkout work flawlessly.
  • Mobile Compatibility: Test editors and previews on smartphones and tablets.
  • Performance Checks: Monitor page speed and optimize where needed.

Customer Support Tips

  • Live Chat: Provide real-time support for upload or customization issues.
  • FAQ Section: Include answers to common questions about file formats, print quality, and delivery times.
  • Feedback Loop: Encourage customers to leave reviews and suggestions to improve your service.

Branding and Customer Experience

  • Branded Emails: Use plugin integrations to send order confirmations and shipment notifications with your brand.
  • Consistent Design: Align the product editor interface with your store’s colors and style.
  • Packaging & Unboxing: If managing your own DTF printing, consider branded packaging to delight customers.

Conclusion

To master a DTF WordPress plugin it’s all about the right tools, setup and workflow. By choosing a plugin that’s versatile, setting it up with WooCommerce and optimising the design editor for usability and branding you can create a seamless experience for your customers.

Following a structured approach – allowing high res uploads, live previews, customising the editor and optimising performance – your store will run smoothly and produce print ready designs every time. 

Add to that best practices for SEO, customer experience and automation and your store will be professional, scalable and ready for the growing print on demand market.

So for store owners the takeaway is clear: invest in the right plugin, fine tune your workflow and deliver a smooth branded experience – this is the key to a successful DTF WordPress store.

For best performance and reliability get Rocon WordPress hosting. Optimized for speed, security and plugin compatibility Rocon will make your DTF store run smoothly, load fast and give your customers a better experience.

Start the conversation.

    Leave a Reply

    Your email address will not be published. Required fields are marked *

    Recommended articles

    WordPress

    Fixing HTTP Error 407 “Proxy Authentication Required”

    James

    Icon

    7 Min Read

    WordPress

    How to Make a Subscriber an Admin on WordPress

    Nitish

    Icon

    6 Min Read

    WordPress

    8 Best GoDaddy Hosting Alternatives 2025 – Faster & Reliable

    James

    Icon

    8 Min Read