How to Transfer a WordPress Site to a New Host: Complete Guide
May 26, 2026 Written by Maria


May 26, 2026 Written by Maria
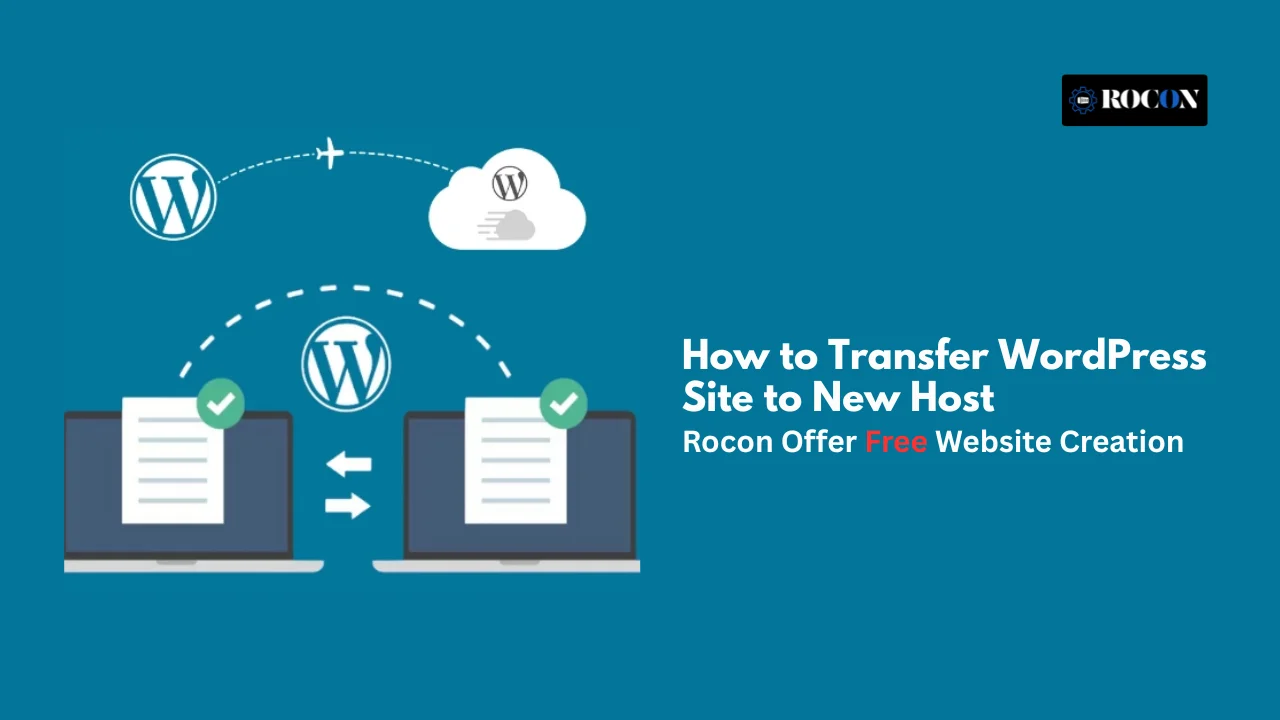


Switching hosts sounds risky. It doesn’t have to be. With the right prep, you can move a WordPress site to a new host without losing data, breaking email, or dropping search rankings.
This guide covers all 3 migration methods, shows you how to test the new site before flipping DNS so visitors never see a broken site, and walks through the post-migration fixes most tutorials skip. Things like email migration, SSL certificate reinstalls, and cache clearing.
Before you put in 2 to 4 hours of work, check that a new host actually fixes your problem.
Real reasons to migrate:
Reasons that aren’t really hosting problems:
If your reason matches the first list, keep going.
Most failed migrations fail at this step, not during the move itself. Spend 30 to 60 minutes on prep and the rest goes smoothly.
Non-negotiable. Before anything else, create a complete backup.
Two parts to back up:
wp-content, wp-config.php, wp-admin, wp-includes, and all core files.Use UpdraftPlus for the easiest backup. Install it, click Backup Now, tick both files and database, send the backup to Google Drive or Dropbox.
Or back up manually: download files via FTP (FileZilla), export the database from phpMyAdmin (Export tab > Quick > SQL > Go).
Save the backup to your computer, not just the server. If something goes sideways, you need access independent of any host.
The single most overlooked step. Open a text file and record:
wp-config.php beyond defaults.htaccess rulesThis file is your reference when configuring the new host. If something breaks after migration, you’ll know what was different.
Counts matter for verification after the move.
After migration, you’ll check these against the new site to confirm nothing got dropped.
If you haven’t picked one yet, the choices that matter:
Sign up before starting the migration. Make sure the new host has WordPress installed and ready, or do the install yourself with their 1-click installer.
You’ll switch between 6 to 8 different logins during the move. Have them ready:
Drop them all in a password manager or secure note. Scrambling for passwords mid-migration is how people make mistakes.
This step takes 2 minutes and saves you from hours of mixed visibility issues. Do it 24 to 48 hours before the migration.
Log into your domain registrar. Find DNS settings. Look for the TTL value on your A record.
When you eventually update DNS to point at the new host, the change spreads worldwide in 5 minutes instead of 24 hours. Visitors don’t get stuck on the old server for a day.
You’ll set TTL back to a higher value after the migration completes.
Pick a time when your site gets the fewest visitors. For most business sites, this is late night or early Sunday morning. Check Google Analytics for your specific traffic pattern.
If you run an active store or community, post a brief maintenance notice 24 hours ahead. Most users won’t notice a 1-hour window if you pick the right time, but stores need warning.
Migration is a chance to lighten the load. Spend 15 minutes:
Smaller site means faster migration and fewer things that can break.
Pick your method based on technical comfort and site size.
| Method | Skill level | Time required | Cost | Best for |
|---|---|---|---|---|
| Host-assisted migration | Beginner | 15 to 60 min hands-on | Free with many hosts | Non-technical users, any site size |
| Migration plugin | Beginner to intermediate | 1 to 2 hours | Free or $39 to $99 for premium versions | Most sites, especially under 1GB |
| Manual via FTP and phpMyAdmin | Intermediate to advanced | 2 to 4 hours | Free | Large sites, complex setups, troubleshooting failed migrations |
Method 1 is by far the easiest if your new host offers it. Method 2 covers 80% of self-service migrations. Method 3 is for sites that are too big for plugins or have weird setups.
Many managed hosts handle the entire migration for free as part of their hosting plan. Rocon, Kinsta, WP Engine, SiteGround, and several others offer this.
The process is usually:
If you’re going with Rocon, this is the simplest path. Their team does it for free, you skip the technical work, and the migration finishes in 1 to 3 business days.
This is the path most people take. Several plugins handle the export-package-import flow.
The 4 worth considering:
Duplicator
All-in-One WP Migration
Migrate Guru
UpdraftPlus
For most users, Duplicator (free) is the right starting point.
1. Install Duplicator on your current site: Go to Plugins > Add New, search for Duplicator, install, activate.
2. Build a package: Click Duplicator in your dashboard, then Create New > Next > Build. The plugin scans your site, then bundles everything into 2 files:
installer.phpBuild takes 1 to 10 minutes depending on site size. If it fails, your site is probably too big or your server timed out, switch to Migrate Guru or manual migration.
3. Download both files: to your computer.
4. Create a database on the new host: Log into your new host’s cPanel. Find MySQL Databases. Create a new database, a new user, and assign the user to the database with All Privileges. Note the database name, username, and password.
5. Upload the 2 files to the new host: Use FTP (FileZilla) or the host’s File Manager. Drop installer.php and the archive zip into the new server’s public_html.
6. Run the installer: In a browser, go to yournewdomain.com/installer.php. Duplicator shows a setup:
Click Validate. If everything checks out, click Next. Duplicator unpacks the archive and rebuilds your site. Takes 1 to 5 minutes.
7. Test the new site on the temporary URL: Don’t change DNS yet. Click around. Check pages, posts, images, forms. If anything’s broken, fix it here before visitors see it.
8. Clean up: Once everything works, delete installer.php, the archive zip, and any leftover Duplicator files from the new server. Anyone who finds them can hijack your site.
The slowest method, but the one you’ll use when plugins fail on huge sites or when you want total control. Takes 2 to 4 hours.
Connect to your current host with FileZilla. Username, password, hostname from your hosting panel.
Navigate to public_html. Select everything, drag it to your local computer. This includes wp-admin, wp-content, wp-includes, wp-config.php, .htaccess, and any other files.
Big sites take a while. A 5GB site can take 30 to 60 minutes over a fast connection.
In your current host’s cPanel, open phpMyAdmin. Select your WordPress database from the left sidebar. Click Export at the top. Choose Quick > SQL > Go. Save the .sql file.
If your database is very large (over 100MB), use the Custom export option and split it into chunks.
Log into the new host’s cPanel. Find MySQL Databases. Create:
Connect via FTP to the new host. Upload everything you downloaded in Step 1 to the new server’s public_html folder. Same caveat as before: a big site takes time.
In the new host’s phpMyAdmin, select your new database. Click Import at the top. Browse to your .sql file. Click Go.
If the file is over 50MB, phpMyAdmin will reject the upload. Solutions:
.sql to a .zip or .gz firstThe migrated wp-config.php still has the old database credentials. Edit it on the new server. Find these lines and update:
define('DB_NAME', 'new_database_name');
define('DB_USER', 'new_database_user');
define('DB_PASSWORD', 'new_database_password');
define('DB_HOST', 'localhost');
Save the file.
If your domain changed during the move, WordPress still thinks the old URL is correct. Fix it in the database.
In phpMyAdmin, open your new database, find the wp_options table. Find the rows where option_name is siteurl and home. Update both to the new URL.
For internal links inside posts, install Better Search Replace after the site loads, then run a database-wide search-and-replace of your old URL to the new one.
This is where pros differ from amateurs. Test thoroughly on the temporary URL or IP your new host provided. Never flip DNS to a broken site.
Your new host probably gave you a temporary URL like yournewsite.rocon.cloud or an IP address. Use that to test.
If they didn’t, edit your local hosts file to preview the new site on your real domain without affecting anyone else:
On Mac/Linux: Edit /etc/hosts (needs sudo)
On Windows: Edit C:\Windows\System32\drivers\etc\hosts (as administrator)
Add a line like:
123.45.67.89 yourdomain.com www.yourdomain.com
Replace 123.45.67.89 with your new host’s IP. Save. Now your computer treats the new server as if it were the real yourdomain.com. Test everything. When you’re done testing, remove the line.
Run through this before flipping DNS:
If anything’s broken, fix it on the staging URL. Repeat until clean.
Once testing is done, point your domain to the new server.
Most hosts give you 2 to 4 nameservers like ns1.yourhost.com and ns2.yourhost.com. In your domain registrar’s panel:
This delegates all DNS management to the new host.
If you want to keep DNS at the registrar (useful if you have email or other services tied to it), update just the A record and CNAME instead:
www: point to your new host’s domain or your root domainEither option works. Propagation takes 5 minutes (with the lowered TTL from prep) to 48 hours (if you skipped the TTL step).
After DNS propagates, reset the TTL on your A record back to 3600 or 14400 to reduce DNS lookups.
The migration isn’t done when the site loads on the new server. Several things still need fixing.
Caches will lie to you about whether the migration worked. Clear them in this order:
Until all 4 layers are clear, you might see the old site or a half-migrated version.
SSL certificates don’t transfer between hosts. Your new host either has its own SSL or you need to install one.
Most modern hosts offer free SSL via Let’s Encrypt. In your new host’s panel, find SSL/TLS settings, enable Let’s Encrypt or install your existing certificate.
After SSL is active, update WordPress URLs at Settings > General. Change both WordPress Address (URL) and Site Address (URL) from http:// to https:// if they aren’t already.
If some images, CSS, or scripts still load over http://, your site shows a “Not Secure” warning even with SSL active. This is called mixed content.
Install Really Simple SSL (free plugin). It auto-fixes most mixed content issues. Activate it, run the SSL detection, click “Activate SSL.”
For stubborn cases, run Better Search Replace on your database. Search for http://yourdomain.com, replace with https://yourdomain.com.
Log into Google Search Console. Go to Sitemaps. Submit your sitemap URL (usually yourdomain.com/sitemap.xml or /sitemap_index.xml if you use Yoast or RankMath).
If your domain didn’t change, Google reindexes the site automatically over a few weeks. If the domain changed, file a Change of Address in Search Console.
The #1 reason migrated sites vanish from Google: someone left this checkbox ticked.
Go to Settings > Reading. Look at “Search engine visibility.” Make sure “Discourage search engines from indexing this site” is UNCHECKED.
Don’t cancel the old host immediately. Wait 7 to 14 days. Reasons:
After 2 weeks of the new site running clean, cancel the old plan.
Email hosting is separate from web hosting in most setups. Migrating your site doesn’t migrate your email.
If your email was at the old host (like you@yourdomain.com through cPanel email):
If you don’t migrate email properly, incoming emails to your domain will bounce within 24 hours of DNS propagation. Sort this out before flipping DNS.
If your email was already with Google Workspace or Microsoft 365, no migration needed. Just confirm the MX records stay correct after the DNS change.
Things break. Here’s what to do for the most common issues.
The site won’t even load. WordPress can’t talk to MySQL.
Cause: Wrong database credentials in wp-config.php.
Fix: Open wp-config.php via FTP. Verify DB_NAME, DB_USER, DB_PASSWORD, and DB_HOST match exactly what you set in the new host’s MySQL Databases panel. Typos are 90% of cases. DB_HOST is usually localhost, but some hosts use specific values like mysql.yourhost.com. Check their docs.
The page loads but looks broken. Images missing, no styling.
Cause: URLs in the database still point to the old domain or http:// when the site is now https://.
Fix: Install Really Simple SSL. If that doesn’t fix it, install Better Search Replace, search for the old URL or http://yourdomain.com, replace with the new URL or https://yourdomain.com. Run on wp_options and wp_posts tables.
The site shows a generic error page.
Cause: Usually a corrupted .htaccess file, a plugin incompatibility, or wrong file permissions.
Fix:
.htaccess to .htaccess.old via FTP. Load the site. If it works, log into WP admin and go to Settings > Permalinks > Save (this regenerates .htaccess).plugins folder to disable all plugins. Reload the site. If it works, re-enable plugins one by one to find the broken one.The site loads as a blank white page.
Cause: A PHP error, usually from a plugin or theme.
Fix: Enable WP_DEBUG in wp-config.php by changing define('WP_DEBUG', false); to true. Reload the site to see the error message. The error tells you which plugin or theme caused it. Disable that plugin via FTP (rename its folder in wp-content/plugins).
You log in, get sent back to the login page, repeat forever.
Cause: Mismatched site URLs in the database vs. wp-config.php.
Fix: In phpMyAdmin, open wp_options. Update siteurl and home rows to match your actual current URL exactly (including http vs https, trailing slash or not, www vs non-www). Clear cookies in your browser and try again.
Some plugins worked on the old host, broken on the new one.
Cause: Different PHP version, missing PHP extensions, or different memory limits.
Fix: Check the new host’s PHP version (should match or be newer than the old host’s). Check error logs in cPanel for specific missing extensions. Some plugins need extensions like imagick, mod_rewrite, or specific cURL versions. Ask your new host to enable what’s missing.
Customers say they’re not getting your emails. Or you’re not getting theirs.
Cause: MX records didn’t update, or email accounts weren’t migrated to the new host.
Fix: See the “What about email” section above. The fix depends on whether email is at your host or with a third party like Google Workspace.
New host should be faster, but the site feels the same.
Cause: Cache not configured, plugin bloat, or the new host’s caching isn’t enabled.
Fix:
Realistic times by site size:
Add 24 hours for DNS propagation if you didn’t lower TTL beforehand. If you used a free migration service, allow 1 to 3 business days from request to completion.
Moving a WordPress site to new server doesn’t have to be scary. You can relocate your site with little downtime if you plan ahead, make backups, and follow the steps one at a time.
You have two options:
Always test extensively and have backups ready, no matter which method you use. A site migration can make your website faster, safer, and more reliable if you do it right. This will help your online presence grow stronger than ever.
Lower your DNS TTL to 300 seconds 24 hours before the move. Migrate the site to the new host. Test on a temporary URL. Once everything works, update DNS. With TTL at 300 seconds, the change propagates worldwide in 5 minutes, not 24 hours. Your visitors never see a broken or unavailable site.
Not if you back up first and follow the process correctly. Data loss usually comes from skipping the backup or running the migration directly on the live site without testing first. Back up, migrate, test, then point DNS. Done in that order, you keep everything.
Yes, in most cases. Web hosting and email hosting are usually different services even when you bought them together. If your email lives at your old host’s cPanel, you need to set up new mailboxes at the new host, export old emails via IMAP, import them at the new host, and update MX records. If your email is with Google Workspace, Microsoft 365, or Zoho, no migration needed for the email itself, just keep the MX records correct after the DNS change.
Only with FTP and database access. You can grab the wp-content folder via FTP and export the database via phpMyAdmin, then rebuild a fresh WordPress install on the new host using those files. Without FTP or database access either, you can’t migrate the site, you’d have to rebuild it.
Free if you do it yourself. Free if your new host offers migration services as part of their plan (Rocon, Kinsta, WP Engine all do this). $50 to $300 if you hire a freelancer or migration service. The biggest cost is usually your time, not money.
Duplicator (free) for most sites. All-in-One WP Migration for the easiest interface (free version has size limits). Migrate Guru (free) for very large sites where Duplicator times out. UpdraftPlus if you already use it for backups. Each works, the right pick depends on your site’s size and your comfort level.
Yes, that’s what the pre-migration backup is for. If the new site has problems you can’t fix, restore the backup to the old host (the old site files and database are still there until you cancel), and you’re back to the original. Don’t cancel the old host until the new one runs clean for at least a week.
Only if you change URLs or skip the SSL setup. If your domain stays the same and URLs don’t change, Google barely notices the move. If your domain changes, set up 301 redirects from old URLs to new ones and file a Change of Address in Google Search Console. Done right, you keep most of your rankings.
Use a tool like whatsmydns.net. Paste your domain, check the A record across global locations. When most or all locations show the new server’s IP, propagation is complete. Usually 5 minutes with low TTL, up to 48 hours without.
Yes. SSL certificates are tied to the server, not the site. Your new host either provides free SSL via Let’s Encrypt (most do) or you’ll install a fresh certificate. Set this up before pointing DNS so visitors don’t hit “Not Secure” warnings.

Elevate your WordPress hosting with 30-day money-back guarantee, free migration, and 24/7 support.
Sign Up Today
Before You Go… Get 1 Month FREE on Rocon Hosting!

Experience lightning-fast speeds

No downtime or hidden fees

Dedicated 24/7 expert support

Leave a Reply